Looking to sell your private property? It’s easy to feel overwhelmed by the process with so many factors at play, from financial calculations to pricing, marketing, and legal paperwork.
We’ve outlined the entire process in this guide so you can find out exactly what to expect at every stage, and approach it with confidence.
If you want a deeper dive into the exact process according to your property type, check out our full guides on selling a condo or selling a landed home.
Step 1: Calculate your estimated net cash proceeds
Before listing your property, you’ll need to figure out how much cash you’ll eventually be walking away with. This is the most important step and will also affect your next property purchase.
Don’t get thrown off guard by hidden costs you failed to factor in, that will cause more headaches down the line.
There are three main hidden costs to be aware of:
Seller’s Stamp Duty (SSD): You’re liable to pay the SSD if you choose to sell your property within the minimum holding period of up to 4 years, and the rates differ—depending on the date of purchase as well as how long you held the property before selling.
It’s applicable to either the selling price or the market value of the property you are selling, whichever is higher. Refer to our full guide here to calculate how much you might have to pay.
Outstanding loan & lock-in penalties: Check with your bank if there are any early repayment penalties you’ll be liable for, if you’re selling your property during the lock-in period of your mortgage contract.
This penalty is usually 1.5% of your outstanding loan balance.
Refund of CPF and accrued interest: This is a crucial aspect to be aware of, if you’ve used your CPF savings to purchase your property. You’re required to refund the principal amount used and the 2.5% accrued interest, back into your CPF account after the sale of your property.
To visualise your net cash proceeds, use this simple formula:
[Expected price of property] – [outstanding loan amount] – [CPF and accrued interest refund] – [agent commission] – [legal fees] – [SSD (if applicable)] = [Total net cash proceeds]
Step 2: Decide whether you want to engage an agent
Now that you’ve got the financial calculations done, the next step is to decide if you’re going to sell your property with or without an agent.
Selling your private property with an agent
This would be the preferred method if you’re looking to sell your property at the best price, and fast. Commission rates for agents usually range around 2% to 3%, split between your agent and the buyer’s agent.
When you’re looking for an agent to partner with on your property sale, look out for the following key areas.
- Marketing: Ask which portals they list on. How big is their marketing reach? What’s the quality of their past listings, are there professional photos, videos, virtual walkthroughs, etc? Do they run any paid ads for their listings?
- Pricing: Your agent should advise you on the recommended pricing for your property based on reliable transacted data, and factor in unit-specific attributes rather than give a flat price per square foot (PSF) average.
- Negotiation: Find out more about how they handle offers, and how they qualify buyers before negotiating. Do they have a good track record? How long did their recent negotiations take?
If you’re looking for an agent that has all the qualities listed above and more, why not reach out for a free consultation with Propseller?
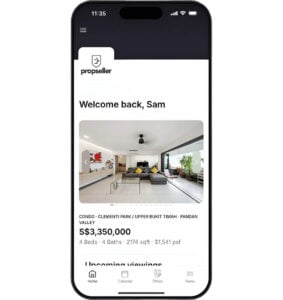
You’ll get matched to a top agent who’s backed by a team of experts, comprising property marketers, valuation specialists, photographers, and more.
In addition, your property listing will get the maximum marketing reach available through ads on 5 main property platforms, 3 social media channels, and the Propseller mobile app.
Selling your private property without an agent
Prefer to DIY and save on the 2-3% agent commission costs? That’s doable too. Just be prepared that you’ll have to take on all the research, marketing, buyer screening, negotiation and paperwork involved.
Valuation and pricing
Since you don’t have an agent to help you pull market data, you’ll need to pull similar transactions yourself via platforms like the Urban Redevelopment Authority (URA)’s e-services portal, or use our free private property valuation tool here.
Going direct-to-buyer
This is one of the main reasons why it’s easier to use an agent. Most of the major property portals require you to have a valid license from the Council for Estate Agencies (CEA) in order to list on their platform; individuals are not allowed to list on them.
In order to reach buyers directly, you can opt to list on smaller property portals or platforms like Carousell. You can also use your personal networks, online community groups, and more to promote your listings.
Another option to consider would be 99.co’s Owner Listings. You’ll be able to list your property without an agent for free, and have the option to not pay commission to agents by indicating it in your listing.
However, do note that your listing will be advertised to agents with buyers, and not buyers themselves directly.
Use resources from the Council for Estate Agencies (CEA)
The CEA website has very useful resources you can use to help your DIY journey. They have templates for the Option to Purchase (OTP) as well as the Sales and Purchase Agreement, and also provide checklists you can refer to when dealing with the transaction.
However, as you’re living in a private property, the value of your home is likely to be significant, and a mispricing or even the slightest mistake in marketing your property could lead to a slower home sale and potentially large financial loss.
So it might be best to sell your home fast and for the best price with experienced agents like ours.
Step 3: Determine your pricing strategy
Pricing is arguably the most important aspect of a sale. If you get it right, you’ll get serious offers fast.
As a start, use our Property Valuation Calculator to get an instant, free valuation of your property.
Powered by comprehensive data, advanced machine learning, and AI, you’ll get your property valuation in seconds.
Here are some additional tips to keep in mind too, as you build out your pricing strategy.
Check the actual transaction data, not asking prices
Rather than relying solely on the listing prices of units nearby, use URA e-services or property portals to get real transacted prices for the last 3 to 6 months.
Get an official bank valuation
This helps you get a good gauge of what the bank will value the unit at for a mortgage loan. Having an asking price that’s much higher than the bank valuation may cause financing issues for your buyer, even if they’re willing to pay.
Knowing what this valuation figure is helps you price your property attractively, whilst ensuring prospective buyers can secure a loan for the property.
Be careful of overpricing your property
Buyers who have done their research and checked the transaction data will usually filter overpriced listings out.
This will result in fewer viewings, and cause your listing to sit for too long. Known as “listing fatigue”, your property will end up stagnant on the market for months, and buyers might assume there’s something wrong with the property if it’s unable to be sold.
Step 4: Prepare, stage, and market your property
Once your pricing strategy has been determined, the next step is making your condo unit or landed property look great, to entice potential buyers.
Staging and decluttering
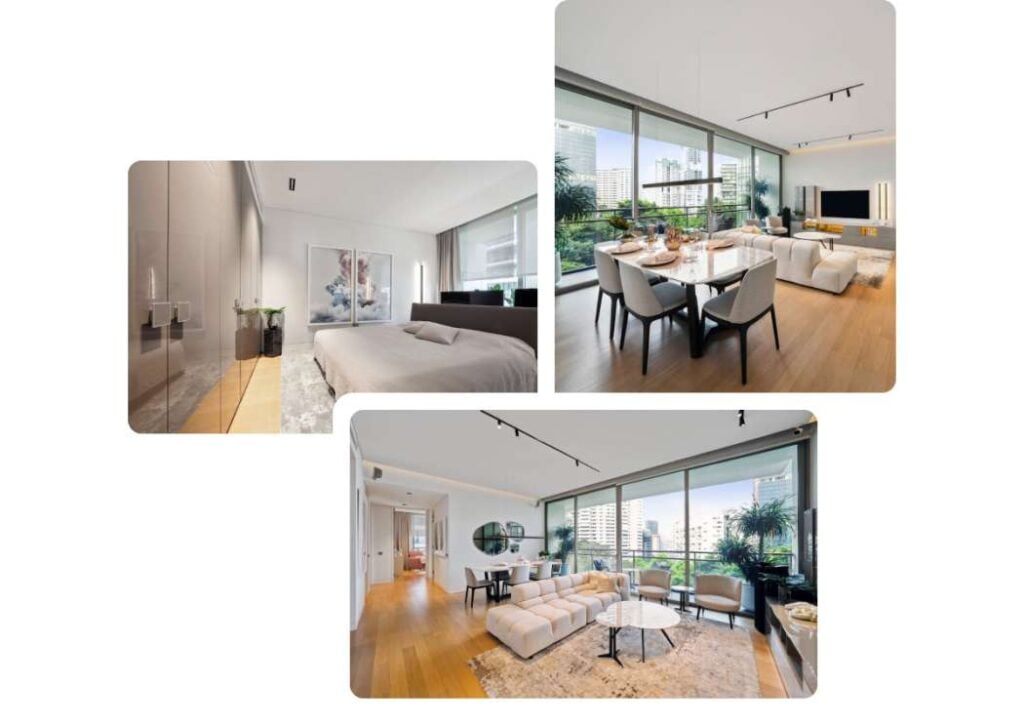
You’ll want your buyers to be able to picture themselves living there. Focus on making your property look presentable and polished with these tips:
- Maximise natural light: Open your curtains and blinds to let sunlight in. Switch on all lights during viewings so your home looks bright and airy.
- Go neutral: If there are parts of your home that have bold or dated tones, consider having a fresh coat of neutral paint. It makes your rooms feel larger and more move-in ready.
- Hide your personal clutter: Pack your items away neatly so prospective buyers can have an optimal experience. Ensure your wardrobes and cupboards are tidy as well, as they may be opened during viewings.
- Fix the small stuff: For areas with chipped paint, stained grout, or more, patch them up so your home looks well-maintained, not neglected.
Digital marketing
Most buyers filter properties online before narrowing the list down to those they want to visit in-person, so the digital presence of your listing matters more than ever. It’ll determine whether you get any quality viewings at all, so we recommend having a mix of the following:
- Professional photography: Wide-angle, well-lit shots will help drive more views of your listing and enquiries than blurry phone photos.
- 360-degree virtual tours: Great option for enabling busy or remote buyers to experience a walkthrough, so they can decide if a physical viewing is worth their time.
- Short-form video walkthroughs: Giving a quick overview of the layout and key features of the property allows buyers to have a better understanding of the space than static photos alone.
If you choose to engage Propseller to help sell your private property, you’ll be delighted to know our experienced team will be supporting you by showcasing your property in its best light.
From quality photos to 3D virtual tours, virtual property staging, and mobile-optimised home tour videos, you’ll get the best digital marketing support needed for your listing.
You can read more on how we do it here.
Step 5: Issue your prospective buyer the Option to Purchase (OTP)
Now that you’ve completed the viewings and found a prospective buyer, you can go ahead with issuing them the OTP.
A legal agreement outlining the terms and conditions for the sale of your property, the OTP grants your buyer the exclusive right to purchase your property at the agreed price within the agreed option period, for a small fee.
- Option fee: In order to receive the OTP, the prospective buyer will have to pay a non-refundable fee (1% of the purchase price). If the buyer decides not to proceed, this fee will be forfeited to you; if the buyer proceeds, this fee will be deducted from the purchase price at completion.
- Option period: This refers to the period in which the OTP is valid for. Typically it’s 14 days, but can be adjusted up to 2 months if both parties are agreeable. During this period, the buyer must secure the approval for their bank loan, and decide whether they will go ahead with the property purchase.
Step 6: Engage a conveyancing lawyer to complete the sale
With the OTP issued, the final stretch is mainly a legal and administrative process. You’ll have to hire a conveyancing lawyer to help you with the final steps required and paperwork to close the deal.
The legal fees typically range from S$1,800 to S$3,500, depending on the law firm you engage and the complexity of the transaction.
Exercising the OTP
Once your buyer decides to formally exercise the option and proceed with the property purchase, they’ll be required to sign the OTP and pay the exercise fee, which is 4% of the purchase price.
This will be paid into your lawyer’s escrow account, and brings their total upfront payment to 5% of the purchase price when combined with the 1% option fee they’ve paid previously.
Completion and handover
Completing the sale typically takes 8 to 12 weeks after the OTP has been exercised, providing both the buyer’s and seller’s lawyers sufficient time to finalise the legal paperwork, loan disbursement, and CPF processing.
Your lawyer will receive the remaining balance of the purchase price from the buyer’s lawyer or bank, disburse funds to redeem your bank loan, refund your CPF, and transfer any remaining net proceeds to your bank account.
In the lead-up to the day of completion, you will have to:
- Clear the unit of all your belongings and furniture (unless otherwise agreed with the buyer)
- Take your final utility meter readings for electricity, water, gas and settle any outstanding utility bills
- Terminate the GIRO arrangement for property taxes, since you’ll no longer be the owner
- Hand over all keys, access cards, etc to the buyer (coordinated through your lawyer or agent)
On completion day, the process will be handled entirely by the lawyers from both sides, so you’re not required to attend a physical meeting, unless there are some last-minute documents to be signed.
Once everything has been handed over to the buyers by your lawyer, the transaction is officially complete, and you’ve successfully sold your private property. Congratulations!
Keen to sell your private property?
We hope you’ve found this guide useful in explaining the entire process involved. Selling your private property can be quite a complicated process, all within a tight timeline.
Getting any step wrong, such as underestimating CPF refunds, or mispricing the unit, can be costly and add unnecessary stress to an already huge financial decision.
Juggling all of this yourself, on top of full-time work and daily life, is difficult and will take up a lot of your time and energy.
That’s why having an experienced partner will add so much value—getting a dedicated team who can run the numbers accurately, price and market the property strategically, negotiate on your behalf, and manage the legal process end to end will take the load off your plate and make this process much more enjoyable and smooth-sailing.
What’s more, it’s a good time now to sell your private property.
Propseller can handle the entire process for you, from valuation to handover. Our agents are the top 1% in the field, and we’ve been rated 4.8/5 from over 1,000 reviews.
Get started with a free consultation today!